
Project #1: Silhouettes
I already posted this project on Facebook, but I got this idea from "The Nate Berkus Show". You can either click the hyperlink I listed (which shows a video) or here are the easy steps:
- Take a picture of your child looking sideways, but against a white wall. (I did this around Christmas time, so I had them say cheese to the Santa figure I sat on a nearby chair.)
- Upload your photo, crop if necessary, and enlarge to fit an 8.5 x 11 piece of paper. Print out (in grayscale to save your ink).
- Using a sharpie marker, trace around the image; then using an X-acto knife (bought mine at Walmart in the craft section), cut along your sharpie-traced lines. You can use a regular scissors too, but the X-acto knife is just a little more precise.
- Use this to trace onto a black piece of construction paper; use a white colored pencil so you can see it better while cutting.
- Using the X-acto knife again, cut along your white line.
- Lastly, position how you'd like in a simple frame. (I put my silhouettes on white card stock before I set them in the frame.) Using a frame that has the white matting too makes the silhouette stand out that much more. I used a 16x20 frame, with the 8x10 opening.
I just love mine!!

~~~~~~~~~~~~~~~~~~~~~~~~~
Project #2: Pinterest inspired wall art
For this project I bought 3) blank canvases (if I recall the sizes were 16x16, 12x12 & 8x8), which was about $20. Then I bought one yard of pretty fabric, which cost about $7. (This would be a great idea for a nursery...there were tons of fabrics for babies!) I actually gave this set away for a birthday gift for that someone that already has everything.
Take your fabric and lay it face down on a table. Take a canvas, set it face down on the fabric and cut enough fabric to cover the canvas (and its edges). Using a stapler (I used a fancy dancy construction one that Jay had), staple the fabric onto the back of the canvas. Just make sure to keep your fabric stretched so it stays tight. How simple is that?!

~~~~~~~~~~~~~~~~~~~~~~~~~~~~~
Project #3: Another Pinterest wall art idea
When I seen something similar on Pinterest, I knew I had to do it for the kids rooms. They had just the initial, but I wanted to incorporate their whole name in there. It was a little more time consuming than the other two projects, but totally worth it!
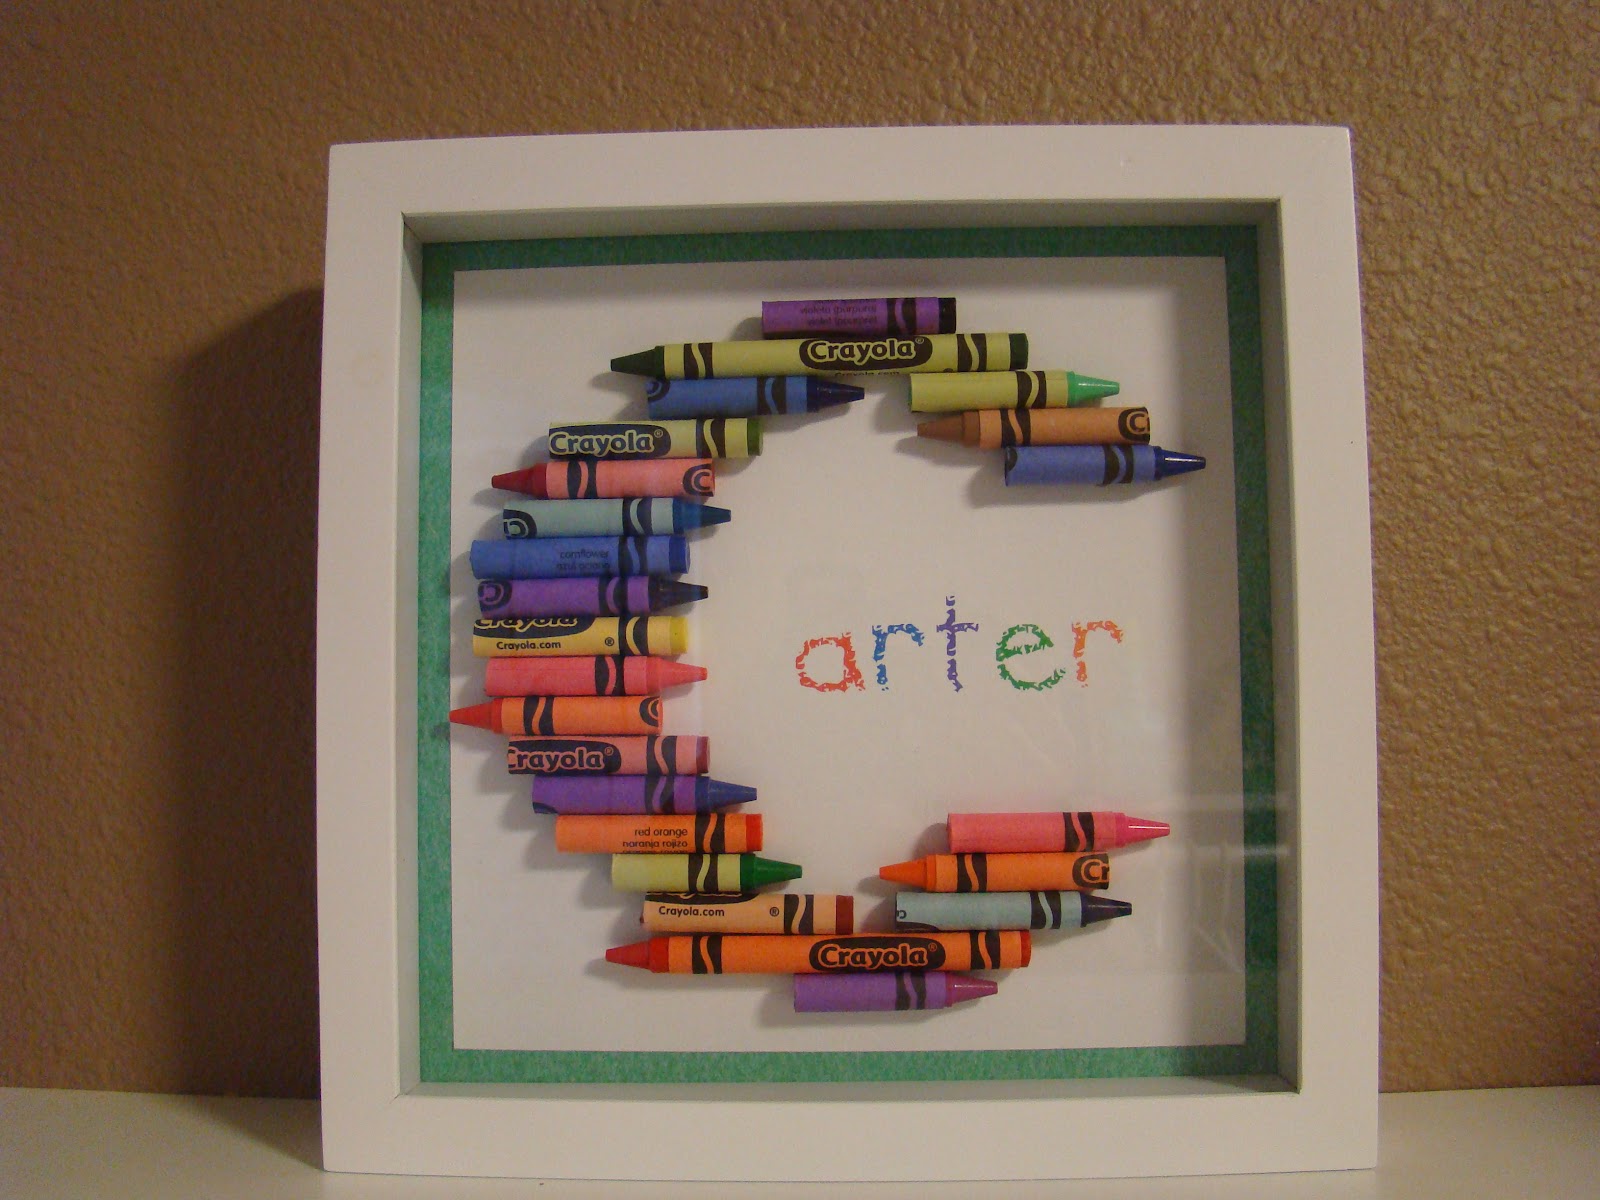
In this project, I used the following for each: 1) 8x8 shadow box and about 15) crayons. Also had help from a glue gun, spray adhesive, and a utility knife.
- The first thing I did was use Photoshop (you could use Microsoft Publisher or Word too, I'm sure) to help me design my layout using a 8x8 size. If you look very closely in the picture, I have a "C" that surrounds the rest of the kids names. I did it as light as I could so you wouldn't be able to notice it in the finished project; it's just there as a base. (I also added a light border around the text box so I'd have a perfect 8x8 cut too.) I found a font called "Billy Bear's Crayons" and I added the rest of their names and positioned it where I wanted it.
- I printed them out on card stock, so it wouldn't get bubbly when I glued the back and I thought it would probably hold the weight of the crayons better.
- Next, I trimmed it down to the 8x8 size.....and then trimmed down about another inch because I decided I wanted to use scrapbook paper to give it a little matting appearance. (Live and learn and know what you want beforehand.) :-)

4. Using the spray adhesive, I bonded the back of the paper to the cardboard back of the shadow box (for extra strength). This picture below actually shows them already glued to the back, but you can't see that.

5. Next, use a utility knife and cut the crayons. Best way is to circle the crayon along the blade and it just breaks. (The project from Pinterest suggested using an Olfa blade, but I didn't have one of those.)
6. Before I hot glued my crayons onto my "C", I moved them around a bit and finally decided on positioning each crayon's center on the inside edge of the "C". It not only kept the look consistent, but it helped cover up my base "C".
7. Put it all together and you have a cute little piece of wall art that will be adorable in the kids' rooms!

Hope this inspired you to get "a little bit" crafty. :-) I have a few more things I found on Pinterest that I know I HAVE to try. If they turn out how I want them to, I'll post them too.


